This post follows on from my previous post Tipi Sewing.
We spent almost three weeks over the Xmas holiday period camping in our Tipi. It was pretty much everything I hoped it would be – light, airy, spacious & comfortable.
We camped on my sister’s lifestyle block, as did a number of extended family just for the few days around Xmas. We did end up sleeping in my sisters house two nights – the night we arrived and the night there was torrential rain. The tipi did leak in places in the torrential rain, and there was the odd drip when it rained, but mostly it was fine.

As with any sewing project, I cast my critical eye on it to assess what I would improve next time and then laughed at myself. Why would I ever make another tipi?! So here are my thoughts should any of you ever make one.
- Take your time when measuring to cut the bottom to shape. This comes at the end of the project and I was in a hurry. We spread the whole thing out over the bumpy back lawn and then had kids running over it while trying to measure. I pretty sure one side is quite a bit shorter than the other because of this. Next time I would find a really flat surface, remove all children, and maybe fold the tipi in half or quarters to get a more even cut.
- I really made the door gap a bit too big. I didn’t follow the instructions – I looked at the measurements given and thought they sounded way to small, so went ahead and biggered it.
- I also made the door covering a bit too small. This was twofold. Firstly when calculating how big a tipi I could make I completely forgot to allow for all the other bits (specifically smoke flaps, facings for door and stick seam, and the door covering) and secondly, when I was sewing the door I was in Wellington and the tipi was in New Plymouth all I had to go was the offcuts from the door facing. I was lucky that I did have a bit more fabric than I thought to be able to complete the tipi, but the door covering was put together from four pieces.
- Don’t use selvedge offcuts for the peg loops, they are not strong enough. I thought I was being efficient, but I should have just used the cotton tape.
- I had no idea how many peg loops to put in along the bottom and put one every 30cm or so. We only pegged every second or third one (& still used about 30 pegs), so 50-60cm would be fine. But extra loops around the door area would be helpful.
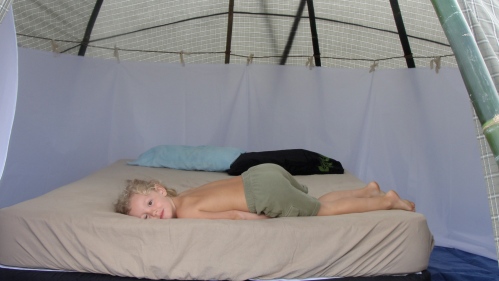
- The lining needed to be higher and have more than one rope & set of ties to hold it up. I used 150cm wide parka nylon cut into panels 1m at the top & 1.5m at the bottom. I only put ties at the seam lines on the bottom, but it needed more ties to make it fit nicely around the bottom of the tipi. 1.5m seemed tall enough when I was making it, but of course, the finished height is a lot less as it is sitting at an angle. My son insisted on photo bombing while I was trying to get pics of the lining!
![DSC04109]()
Unfortunately I don’t have photos of us erecting the tipi. The day we put it up we had about 3 goes to get the poles approximately right. . . and then it still wasn’t quite. It was saggy at the top, though taut at the bottom and so flapped about in the wind, and overall the tipi cover was sitting too low to the ground.
I’m one of those weird people who really enjoy putting up tents. I didn’t feel discouraged that it took several goes – I had been anticipating that it would.
After Xmas we took another afternoon to take it down and try again. This time we lifted up where the poles join quite a bit higher and added in two more poles. The tipi cover ended up sitting quite high above the ground, but apparently that is fine as long as you have a decent liner set up. It was still a tad to high as where the tipi cover sat in relation to where the poles were tied together was a bit low.
For comparison, here is the view looking up at the poles from inside the tent – the first go: 
And the second time round:
And from the outside, can you see the canvas bagging in around the poles?

And then sitting nice and taut:
Here is the “stick seam” – how the edges of the tipi are joined together. Hand sewing the reinforcing around each of the holes for the sticks to go though was one of the most time consuming tasks. I couldn’t figure out how to do them on the machine and I hadn’t budgeted the time to do them, and had to enlist my other half to help sew them. My instructions talked about using sticks (of a particular kind of wood) hand carved to shape. We used quality pine dowel from the local Mitre 10, you can see the bar-code still stuck onto one of the pieces!


And lastly a pic showing how the different parts work together. The tipi cover sits up off the ground, the ground sheet comes close to the edge of the cover, but doesn’t extend beyond it, and the liner tucks in and sits on top of the ground sheet (and is usually held down in some way).

As an update to my costing listed in the last post, we had to go out and buy several sets of pegs, and a couple more small ropes adding another $30-40 to the total. That would bring the total to around $260. However, the time investment was a solid weeks work. . .
I am really pleased with this project. It wasn’t particularly tricky, but it was quite a handful(!) due to the scale of the tipi. It was a really awesome feeling to be able to lie in bed going to sleep and think “I made this shelter for my family”.


